In my early years, my curious little mind was baffled by a button near the input gain knob on my dad’s analog console labeled HPF.
Since live sound reinforcement was my dad’s specialty — and I was his little helper — I naturally turned to him to find out what this mysterious little button did. Without launching into a scientific explanation, he simply said:
“I press this button on every vocal. It keeps the mix from sounding muddy.”
That was it. No deep technical breakdown. Just a practical, real-world solution.
Later on, I would learn just how powerful those three little letters — HPF — really were.
To this day, when I’m crafting a live mix, the first EQ tool I reach for is the high pass filter (HPF).
What Is a High Pass Filter?
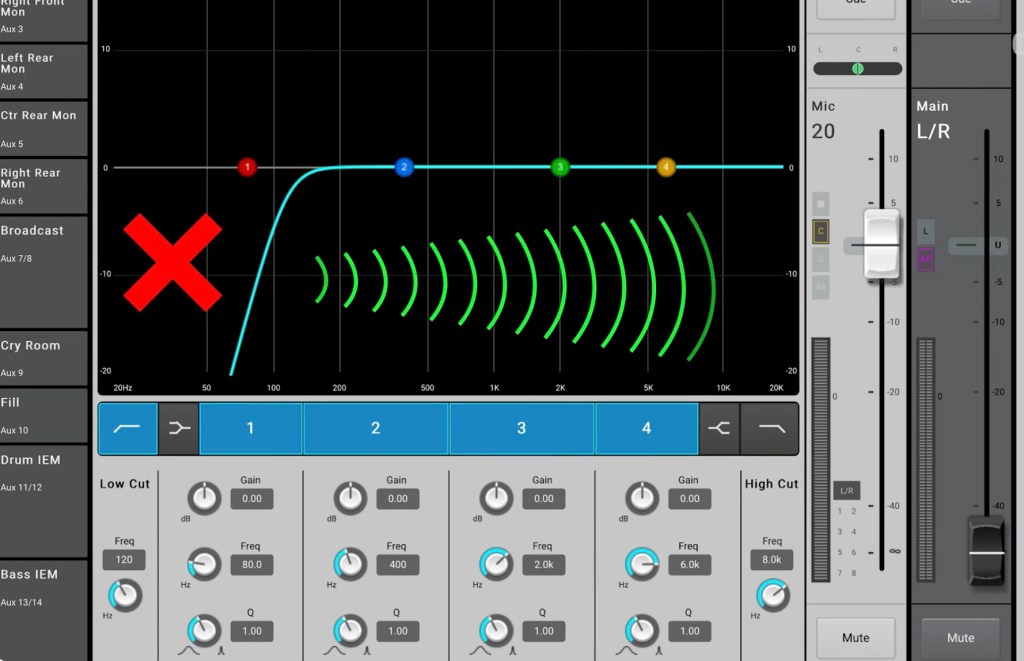
A high pass filter (HPF), sometimes referred to as low-cut, allows audio above a selected frequency to pass through while removing everything below that frequency — the low-frequency content.
In live sound, this is incredibly useful because many signals contain low-frequency information that doesn’t actually contribute to the sound you want, but still eats up headroom and muddies the mix.
Why the HPF Matters in a Live Mix
A high pass filter is essential for creating a clear and present mix, especially when multiple instruments are competing for low-frequency space.
The truth is, many sounds don’t need much low end at all to sound full.
If two instruments are fighting for the same frequency range, consider high passing one of them to create space for the other.
This simple move alone can dramatically improve clarity.
Remove What an Instrument Doesn’t Produce
Every instrument operates within a specific frequency range. Using a high pass filter allows you to remove frequencies that an instrument doesn’t naturally produce.
For example:
An average male pop vocal operates from around 100 Hz and up.
By applying a high pass filter below that range, you remove unnecessary low-frequency energy and increase vocal intelligibility.
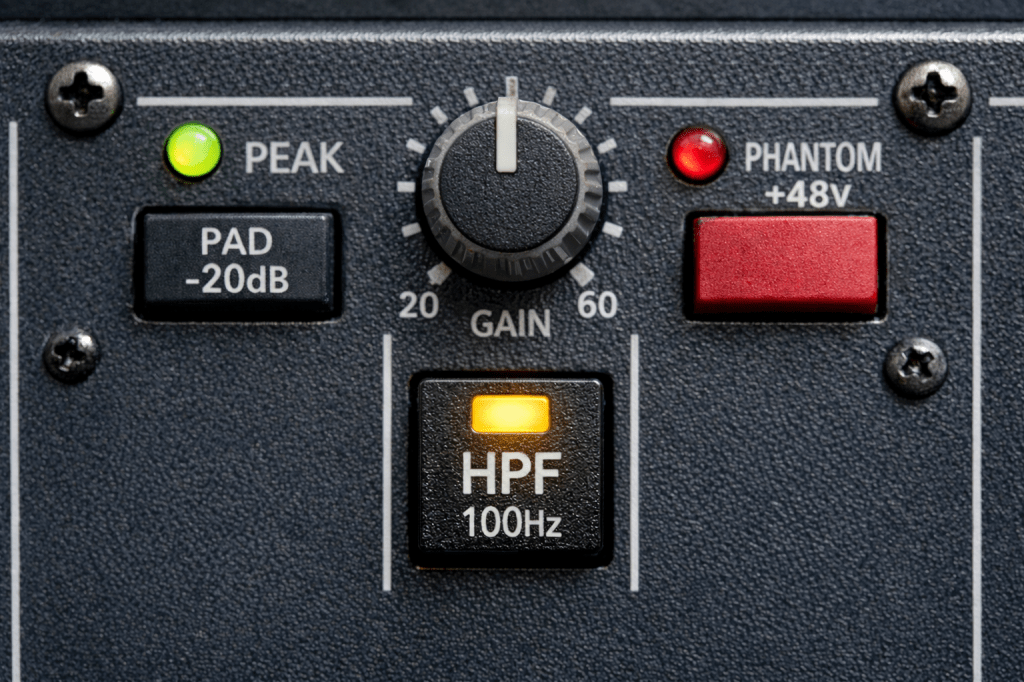
Remember that little HPF button at the top of my dad’s analogue console? It was fixed at a 100 Hz low-cut roll-off. That’s why he told me to engage it on every vocal — it immediately cleaned things up.
On a digital mixer you can always adjust the filter later — but starting here keeps your mix clean from the beginning.
Clean Up Unwanted Noise
High pass filters are excellent for removing low-frequency noise that shouldn’t be reinforced, such as:
- HVAC rumble
- Wind noise
- Stage vibration
- Traffic noise
- Airplane noise (a real issue at one of the venues where I run sound)
- Mic stand handling noise
All of this low-end buildup adds up quickly. The HPF keeps it under control.
Taming Plosives
Plosive “P” sounds can cause big low-frequency pops in vocal microphones.
A high pass filter helps reduce the impact of those plosives, making the vocal smoother and more controlled.
Improve Gain Before Feedback
Any time you run a microphone through a loudspeaker in the same room, feedback is a possibility.
Low frequencies — typically below 200 Hz — are omnidirectional. That means they spread everywhere, regardless of where the speaker is pointing. These low frequencies are often the first to feed back.
Using a high pass filter helps increase gain before feedback by removing those problematic low frequencies.
Where Should You Start?
A good rule of thumb:
Start your high pass filter around the lowest note the instrument is capable of producing.
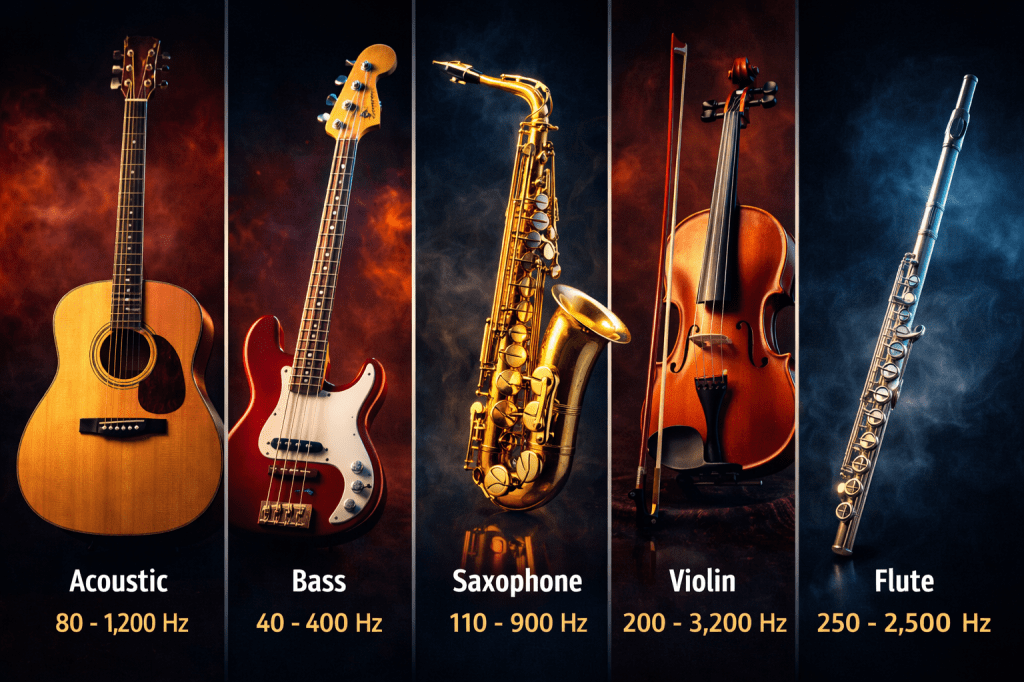
This is why it’s helpful to know the frequency ranges of common instruments. I used to keep a chart handy to look them up when needed. These days I just consult with my good friend AI if I run across an instrument whose frequency range I don’t have memorized.
Here’s how I typically start:
- Vocals → Start around 100 Hz
- Acoustic guitar → 80–120 Hz
- Electric guitar → 100 Hz or higher
- Speech microphones → 100 to 120 Hz (sometimes higher depending on the microphone)
- Keys / Piano → Start around 100 Hz, then adjust based on arrangement
Some instruments — like piano and keyboards — are technically full range, but they aren’t always used across their full range. I’ll often start at 100 Hz and adjust once I hear how they’re functioning in the mix.
Where Cleaner Mixes Begin
There’s so much more to be said about our powerful little friend, the high pass filter (HPF). In future posts, I’ll share real-world examples from live mixes where this simple tool made a huge difference — from cleaning up muddy stages to improving gain before feedback in challenging environments.
Over the years, I’ve worked with many volunteers in churches who don’t necessarily want to become professional audio engineers. They just want to know enough to be helpful and support their teams well. When I’m training these volunteers, I often tell them: even if you don’t learn anything else about EQ, learn how to use the high pass filter.
If you understand this one tool — when to use it, why to use it, and where to start — you’ll instantly make your mixes cleaner, clearer, and easier to manage. It’s one of the fastest ways to improve your sound without getting buried in technical details.
Master the HPF, and you’re already well on your way to building a better mix.


Leave a comment